플라스크
[Flask 입문] 플라스크로 웹 프로그래밍 입문하기
이번 포스팅을 시작으로 필자는 파이썬의 웹 개발 프레임워크인 Flask에 대해 공부한 내용을 정리해볼까 ...
blog.naver.com
플라스크는 파이썬으로 작성된 웹 개발 도구로 마이크로 프레임워크라고 부른다.
그이유는 플라스트로 웹 개발을 하는데에 특별한 도구나 라이브러리가 전혀 필요없기 때문에
플라스크는 파이썬을 알고 있다면 매우 배우기 쉽고 짮은 시간안에 퓁 어플리케이션 하나를 뚝딱 만들 ㅅ플라스크는 파이썬으로 작성된 웹 개발 도구로 마이크로 프레임워크라고도 부른다.
그 이유는 플라스크로 웹 개발을 하는 데에 특별한 도구나 라이브러리가 전혀 필요 없기 때문에
플라스크는 파이썬을 알고 있다면 매우 배우기 쉽고,
짧은 시간 안에 웹 어플리케이션 하나를 뚝딱 만들어낼 수 있다.
물론 너무나 간단하다 보니,
보다 복잡한 기능의 구축에 있어선 다른 프레임워크에 비해 효율이 떨어졌지만 꾸준히 업데이트가 되고 있어 큰 걱정은 필요 없다.
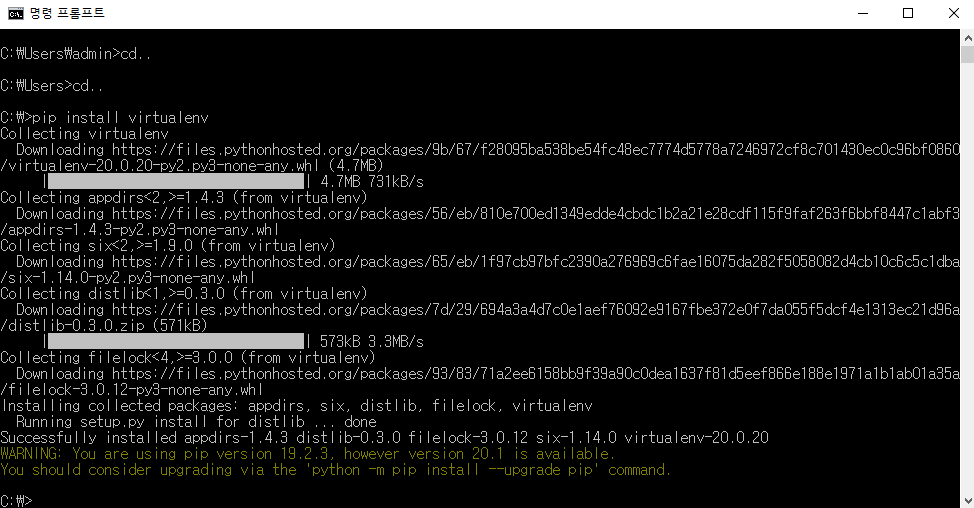
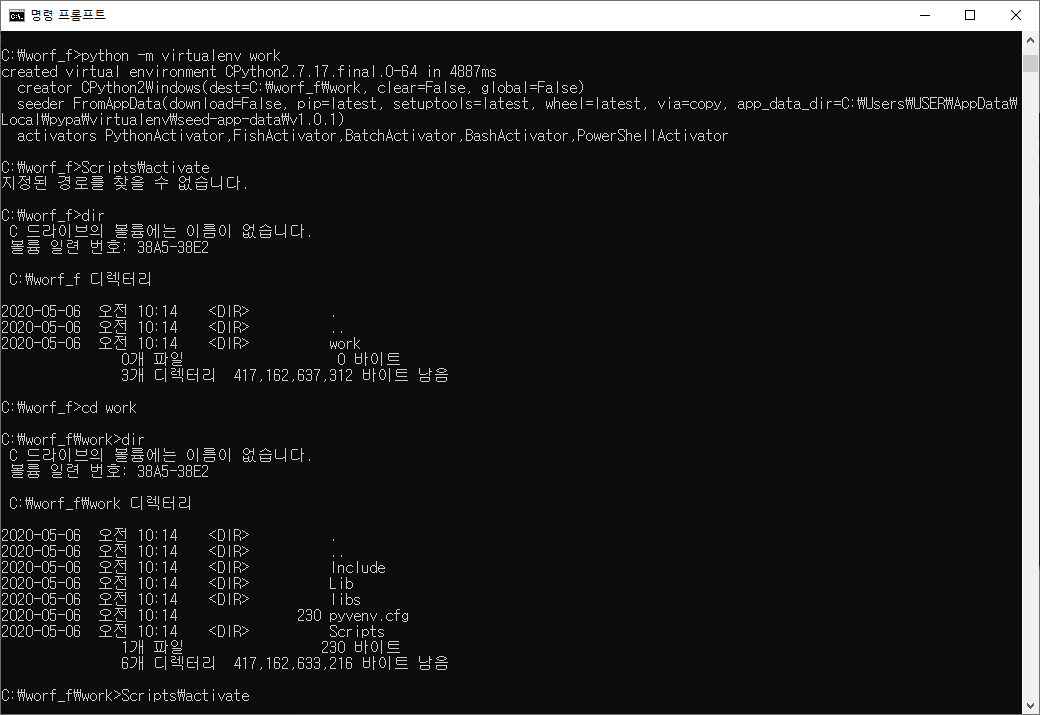
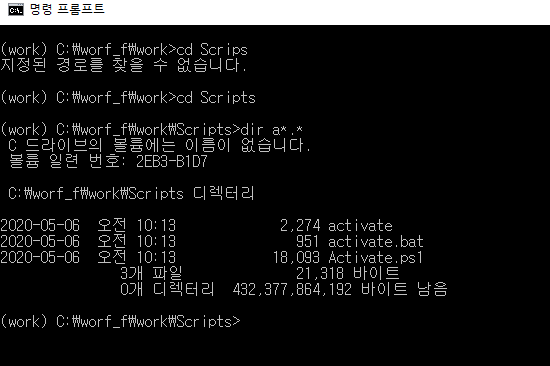
가상환경 구축하기

dir test.* - >파일명이
dir_ a*t*.*/s -> 서브폴더까지 전부 찾아달라고 요청 할 때.
dir_a*.* : a로 시작하는 모든 파일
dir_test.* : 파일명이 test인 모든 애들
dir_*t*.* : t를 포함하는 모든 것들
dir_*t*.*/s : 서브폴더까지 전부다 찾아달라고 요청
dir_*t*.*/s/p : 서브폴더 / 서브서브폴더 등 페이지를 끊어서 볼 수 있다.
리눅스에서는 ls 가 dir 명령어를 대체한다.
~.bat -> 일괄처리 시켜주는 배치 파일
type 파일명.bat -> 파일의 내용을 볼 수 있다.
bin 폴더 안에는 javac.exe/java.exe 가 있음
환경변수를 잡아주는 이유 : 어떤 폴더에서 작업을 하든 운영체제가 알아서 위 실행 파일을 실행 처리를 시키기 위해서.
Java 가 컴파일 되기 위해 필요한 것은 javac.exe
실행할 때 필요한 것 : java.exe
javac.exe, java.exe를 가지고 있는 폴더명 : bin(binary) ( 환경변수 잡아줄 때 bin 폴더까지 잡는다 - 이 폴더 안에 실행파일 있어서 )
환경변수를 설정하는 이유 : 실행파일들의 위치와 내가 작업하는 폴더의 위치가 다르기 때문에 실행파일이 있는 위치를 잡아놓고자 함(javac, java.exe)
* 환경변수의 종류
1) 사용자용 ( 여기에 걸어두면 자동으로 잡아주지 않는다. )
2) 시스템용(우리가 잡은 용도는 모두 시스템용) - 혼자서 컴퓨터를 사용하고 개발 외에는 사용하지 않기 때문


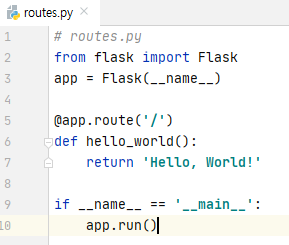


 app = Flask(__name__)

가장 먼저 전역에서 Flask 클래스 객체를 선언하였다.
해당 app 객체를 통해 플라스크를 사용할 수 있게 된다.
__name__의 경우, 해당 코드를 직접 실행시킬 경우, "__main__"이라는 문자열이 들어온다.

@app.route('/')

데코레이터를 사용하여 hello_world 함수를 wrapping 되었음을 알 수 있다.
이 데코레이터를 통해 웹으로 접근한 사용자가 어떤 URL에 따라 어떤 함수를 실행시켜야 할지 정해주거나
위의 예제의 경우'/'(wmr, 메인페이지)가 URL 파라미터인 셈이다.

app.run()
app의 run()메소드를 통하여 플라스크 웹 어플리케이션을 실행 할 수 있다.
아무런 인자도 넘겨주지 않을 경우,
적당히 포트를 잡고 127.0.0.1로 실행 시키게 된다.
주로 사용하는 인자는 다음과 같다.

port(ex:port=5000)
수동적으로 특정 포트 번호를 잡고 싶다면 이걸 사용하자.

host(ex : 0.0.0.0, 127.0.0.1, ...)
해당 웹 서비스로 접근을 허용하는 IP 혹은 Domain을 적을 수 있다.
예를 들어 (127.0.0.1)를 보내면 웹 서버를 실행시킨 해당 PC 외에는 접속이 불가능하지만,
모든 IP를 뜻하는 (0.0.0.0)을 보내면 외부에서도 접속이 가능해지는 셈이다.
# routes.py
from flask import Flask
app = Flask(__name__)
# ex) user/IML, user/ash123
@app.route('/user/<username>')
def show_user_profile(username):
# show the user profile for that user
return 'User %s' % username
# 자기 자신이 실행 될 때 아래 if문이 실행 된다.
if __name__ == '__main__':
app.run()
# routes.py
from flask import Flask
app = Flask(__name__)

# ex) post/123 int 반환
@app.route('/post/<int:post_id>')
def show_post(post_id):
    # show the post with the given id, the id is an integer
    return 'Post %d' % post_id

# 자기 자신이 실행 될 때 아래 if문이 실행 된다.
if __name__ == '__main__':
    app.run()
# routes.py
from flask import Flask
app = Flask(__name__)

@app.route('/')
def hello_world():
    return 'Hello World!'

# ex) user/IML, user/ash123
@app.route('/user/<username>')
def show_user_profile(username):
    # show the user profile for that user
    return 'User %s' % username

# ex) post/123
@app.route('/post/<int:post_id>')
def show_post(post_id):
    # show the post with the given id, the id is an integer
    return 'Post %d' % post_id


# 자기 자신이 실행될 때 실행
if __name__ == '__main__':
    app.run()


   # 같은 파일에 넣어도 한번에 실행이 가능하다.
인자로 받을 변수 규칙에는 string(%s), Int(%d), float(%f) 등이 있으며 아무것도 적지 않을 경우,
자동으로 string 형태로 인자를 주게 된다.
또한, 특정 함수 1개에 복수의 데코레이터를 덮어씌울 수 있다.
예를 들어 아래처럼 2개의 데코레이터를 씌워준 후,
기본 함수 인자 설정을 None으로 해주면 인자가 없을 경우 첫 번째 URL이고,
있을 경우 2번 째 URL이 되는 것이다
@app.route('/hello/')
@app.route('/hello/<name>')
def hello(name=None):
// Code
------------------------
# routes.py
from flask import Flask
app = Flask(__name__)
# ex) user/IML, user/ash123 str 반환
@app.route('/user/<username>')
def show_user_profile(username):
# show the user profile for that user
return 'User %s' % username
# ex) post/123 int 반환
@app.route('/post/<int:post_id>')
def show_post(post_id):
# show the post with the given id, the id is an integer
return 'Post %d' % post_id
#복수의 데코레이터
@app.route('/hello/')
@app.route('/hello/<name>')
def hello(name=None):
return 'User %s' % name
# 자기 자신이 실행 될 때 아래 if문이 실행 된다.
if __name__ == '__main__':
app.run()
웹 페이지 소스를 보는 방법
view-source:https://www.naver.com/
NAVER
이게 오리지널이야, 재즈 힙합의 원곡을 찾아서 2020.05.04 케이팝이 세계를 만날 때 2020.04.29 이주의 디깅 #56 EXO 2020.04.28 팝 음악계 역주행 대표곡들 2020.04.25 키아나 르데와 함께한 음악가들 2020.04.2
www.naver.com
파이썬과 HTML
Templates


# routes.py
from flask import Flask
app = Flask(__name__)
#routes.py
from flask import Flask, render_template
app = Flask(__name__)
#ex)hello/IML
@app.route('/hello/<user>')
def hello_name(user):
return render_template('hello.html', name = user)
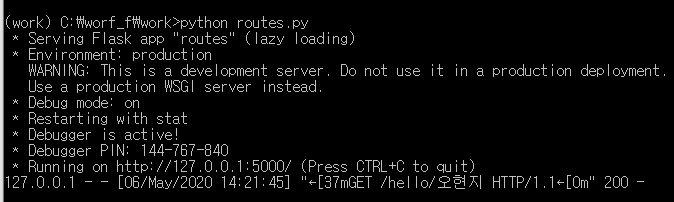
if __name__ == '__main__':
app.run(debug = True)
#HTML에 값을 던져 준다.
플라스크의 경우, HTML 문서를 보관하기 위한 디렉터리를 따로 만들어주어야
해당 파일들을 인식할 수 있는데, 해당 폴더의 위치는 반드시 플라스크를 실행시키는 코드와
같은 경로이며, templates라는 이름이여야 한다. (바꿀 수는 있지만 굳이 바꿀 이유는 없음)

플라스크(Flask) ; Jinja2 템플릿 엔진 기본문법
플라스크에서는 템플릿을 이용하여 html을 구성한다는 설명을 지난 포스팅에서 했었습니다. 그렇다면 이 템플릿을 해석하는 템플릿 엔진인 Jinja2의 기본적인 문법에 대해서도 조금 알아야겠다 싶어 포스팅합니다...
snacky.tistory.com
{{...}} : 변수나 표현식의 결과를 출력하는 구분자
{%...%} : if문이나 for문 같은 제어문을 할당하는 구분자
{#...#} : 주석
{% ... ..#},{%+...%},{%...-%}...: 공백 제거 혹은 유지
기본적으로 진자 템플릿 엔진은 템플릿 줄 끝의 개행 문자를 제외한 나머지 공백은 그대로 출력
실제로 보이는 화면에는 이러한 공백을 제외 하고 싶을 경우에 템플릿 태그 앞뒤에 +나 -를 붙여
+를 붙이면 공백 유지, -를 붙이면 공백 제거의 형태가 되는 것입니다.
{% raw %} ... {% endraw %} : 이스케이프(escape)
우리가 템플릿 형태와 동일한 "텍스트"를 출력하고자 할 때 사용.
{% raw %} 와 {% endraw %} 사이에 이스케이프 할 문자들을 입력.
그러나 {{'{{' }} 와 같이 따옴표로 간단하게 이스케이프 할 수도 있다.
작은 문자열의 경우는 이런식으로 사용하는 것이 편리
플라스크 진자2 반복문(for문)
{% for <개별요소> in <리스트> %}
<실행코드>
{% endfor %}

{% for item in navigation %}
<li><a href="{{ item.href }}">{{ item.caption }}</a></li>
{% endfor %}
플라스크 진자2 반복문(if문)
{% if <조건> %}
    <실행코드>
{% elif <조건> %}
    <실행코드>
{% else %}
    <실행코드>
{% endif %}

{% <실행코드> if <조건> else <거짓일때 실행코드> %}
플라스크 진자2 반복문(for if문)
{% for user in users if users %}
    <li>{{ user.username }}</li>
{% endfor %}
locals()메소드 활용하기
#routes.py
from flask import Flask, flash, redirect, render_template, request

app = Flask(__name__)


@app.route("/")
def index():
    return "Flask App!"


@app.route("/user/")
def hello():
    users = ["Frank", "Steve", "Alice", "Bruce"]
    var = 1
    return render_template(
        'user.html', **locals())


if __name__ == "__main__":
    app.run(host='0.0.0.0', debug=True)

URL 및 HTTP 메소드 다루기
Redirect(리다이렉트)
Flask에서는 URL 간의 쉽고 편한 이동을 위해 redirect 메소드를 제공
from flask import Flask, redirect, url_for
app = Flask(__name__)

@app.route('/admin')
def hello_admin():
   return 'Hello Admin'

@app.route('/guest/<guest>')
def hello_guest(guest):
   return 'Hello %s as Guest' % guest

@app.route('/user/<name>')
def hello_user(name):
   if name =='admin':
      return redirect('/admin')
     #return redirect(url_for("hello_admin"))
   else:
      return redirect(url_for('hello_guest',guest = name))

if __name__ == '__main__':
   app.run(debug = True)


HTTP Methods
http 프로토콜은 WWW(월드 와이드 웹)에서 데이터 통신의 기본 토대
from flask import Flask, redirect, url_for, request
app = Flask(__name__)

@app.route('/success/<name>')
def success(name):
   return 'welcome %s' % name

@app.route('/login',methods = ['POST', 'GET'])
def login():
   if request.method == 'POST':
      user = request.form['nm']
      return redirect(url_for('success',name = user))
   else:
      user = request.args.get('nm')
      return redirect(url_for('success',name = user))

if __name__ == '__main__':
   app.run(debug = True)


//get 방식
<html>
   <body>

      <form action = "http://localhost:5000/login" method = "get">
         <p>Enter Name:</p>
         <p><input type = "text" name = "nm" /></p>
         <p><input type = "submit" value = "submit" /></p>
      </form>

   </body>
</html>


//post 방식
<html>
   <body>

      <form action = "http://localhost:5000/login" method = "post">
         <p>Enter Name:</p>
         <p><input type = "text" name = "nm" /></p>
         <p><input type = "submit" value = "submit" /></p>
      </form>

   </body>
</html>
Static 파일 다루기
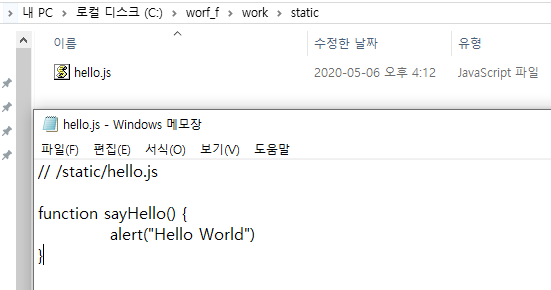
// /static/hello.js
function sayHello() {
alert("Hello World")
}
//routes.py
from flask import Flask, render_template
app = Flask(__name__)
@app.route("/")
def index():
return render_template("hello.html")
if __name__ == '__main__':
app.run(debug = True)
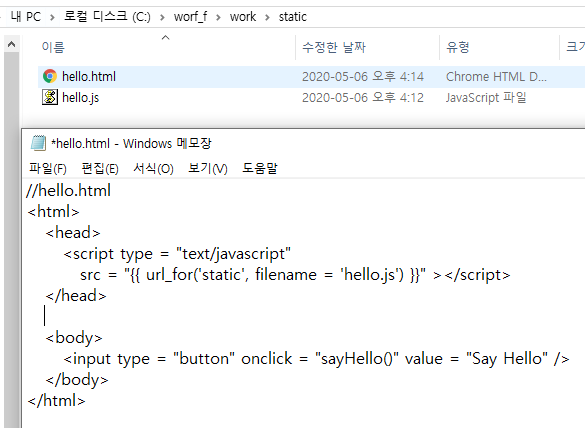
//hello.html
<html>
<head>
<script type = "text/javascript"
src = "{{ url_for('static', filename = 'hello.js') }}" ></script>
</head>
<body>
<input type = "button" onclick = "sayHello()" value = "Say Hello" />
</body>
</html>

//style.css
* {
box-sizing: border-box;
}

*:focus {
	outline: none;
}
body {
font-family: Arial;
background-color: #3498DB;
padding: 50px;
}
.login {
margin: 20px auto;
width: 300px;
}
.login-screen {
background-color: #FFF;
padding: 20px;
border-radius: 5px
}

.app-title {
text-align: center;
color: #777;
}

.login-form {
text-align: center;
}
.control-group {
margin-bottom: 10px;
}

input {
text-align: center;
background-color: #ECF0F1;
border: 2px solid transparent;
border-radius: 3px;
font-size: 16px;
font-weight: 200;
padding: 10px 0;
width: 250px;
transition: border .5s;
}

input:focus {
border: 2px solid #3498DB;
box-shadow: none;
}

.btn {
  border: 2px solid transparent;
  background: #3498DB;
  color: #ffffff;
  font-size: 16px;
  line-height: 25px;
  padding: 10px 0;
  text-decoration: none;
  text-shadow: none;
  border-radius: 3px;
  box-shadow: none;
  transition: 0.25s;
  display: block;
  width: 250px;
  margin: 0 auto;
}

.btn:hover {
  background-color: #2980B9;
}

.login-link {
  font-size: 12px;
  color: #444;
  display: block;
	margin-top: 12px;
}
//hello.HTML

<link rel="stylesheet" href="/static/style.css" type="text/css">

<form action="/login" method="POST">
	<div class="login">
		<div class="login-screen">
			<div class="app-title">
				<h1>Login</h1>
			</div>

			<div class="login-form">
				<div class="control-group">
				<input type="text" class="login-field" value="" placeholder="username" name="username">
				<label class="login-field-icon fui-user" for="login-name"></label>
				</div>

				<div class="control-group">
				<input type="password" class="login-field" value="" placeholder="password" name="password">
				<label class="login-field-icon fui-lock" for="login-pass"></label>
				</div>

                <input type="submit" value="Log in" class="btn btn-primary btn-large btn-block" >
			    <br>
			</div>
		</div>
	</div>
</form>

폼으로 데이터 전송 받기
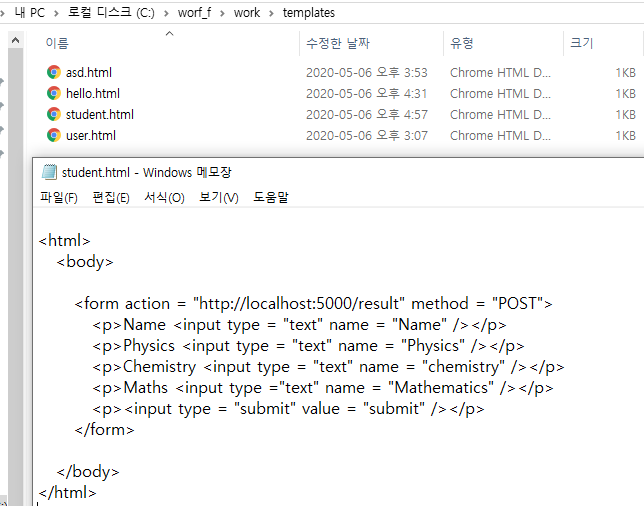
//student.html
<html>
   <body>

      <form action = "http://localhost:5000/result" method = "POST">
         <p>Name <input type = "text" name = "Name" /></p>
         <p>Physics <input type = "text" name = "Physics" /></p>
         <p>Chemistry <input type = "text" name = "chemistry" /></p>
         <p>Maths <input type ="text" name = "Mathematics" /></p>
         <p><input type = "submit" value = "submit" /></p>
      </form>

   </body>
</html>
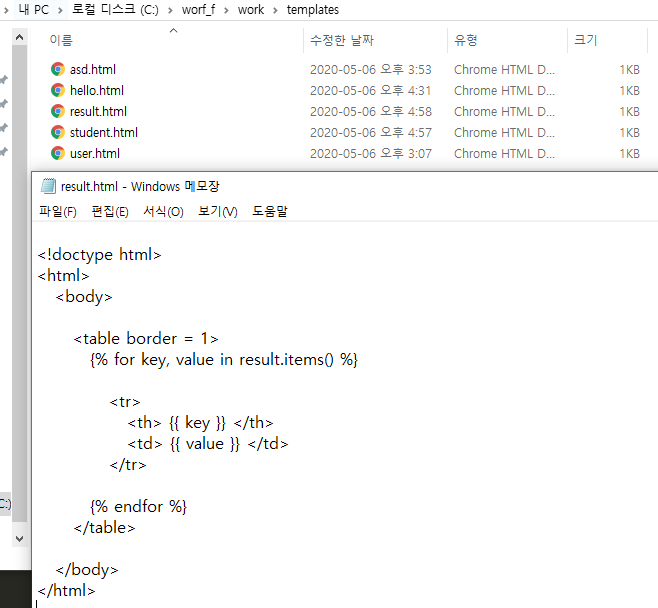
//result.html
<!doctype html>
<html>
   <body>

      <table border = 1>
         {% for key, value in result.items() %}

            <tr>
               <th> {{ key }} </th>
               <td> {{ value }} </td>
            </tr>

         {% endfor %}
      </table>

   </body>
</html>

#폼 객체의 경우 각 데이터를 딕셔너리 형태로 보관하기 때문에 기존에 파이썬에서
사용하는 items() 등의 메소드를 사용하여 출력

#form
#routes.py


from flask import Flask, render_template, request
app = Flask(__name__)

@app.route('/')
def student():
   return render_template('student.html')

@app.route('/result',methods = ['POST', 'GET'])
def result():
   if request.method == 'POST':
      result = request.form
      return render_template("result.html",result = result)

if __name__ == '__main__':
   app.run(debug = True)


   # 특정 필드 값만 뽑아내고 싶다면 request.form['name']와 같은 식으로 처리
플라스크에서 폼의 데이터를 사용하는 방법
result = request.form
폼 관련 데이터를 다루는 부분


':: IT > python' 카테고리의 다른 글
| [파이썬]class 정리 - 정적메소드 @classmethod/@staticmethod /@property 사용하기 (0) | 2020.07.23 |
|---|---|
| [flask]쿠키와 세션 다루기,리다이렉션과 에러처리, 파일 업로드 하기 (0) | 2020.05.07 |
| [파이썬] 데이터 전처리 20200424 (0) | 2020.04.27 |
| [파이썬] 전처리 20200423 (0) | 2020.04.27 |
| [파이썬]수집된 데이터 형식 확인 및 로컬 전처리 (0) | 2020.04.23 |